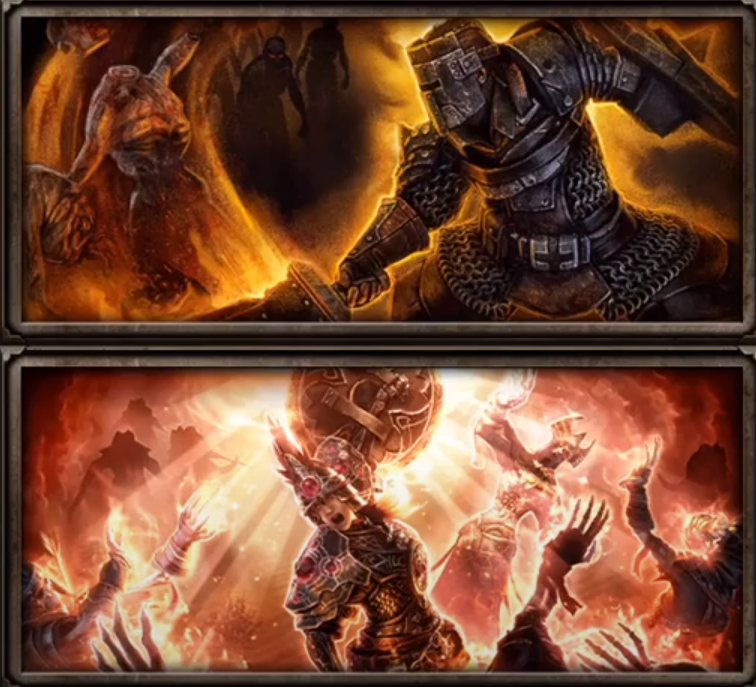
The Warlord (Oathkeeper + Soldier) is one of the more solid and reliable builds that are possible in Grim Dawn. High Block, high defense, solid DPS, and low reliability on specific gear make the Warlord one of the better picks particularly if you are new to the game.
This build is going to be a tanky, Blitz Warlord which is beginner-friendly and especially easy to level. Additionally, the number of active skills is rather minimal making leveling and end-game less complicated. This build is perfect for people who want to explore the world of Grim Dawn and farm the gear for this and future characters themselves.
Thanks to its tankiness, the build can also be played as a hardcore character (not recommended for new players).
Skill-Tree
GrimCalc link to the complete Skill-Tree for reference
This is the GrimCalc link which outlines the complete Skill-tree, as well as the devotions and attributes for level 100. Use this as a reference when you are playing, but be sure to consult the explanations below particularly when it comes to leveling.
Early leveling and Soldier Tree
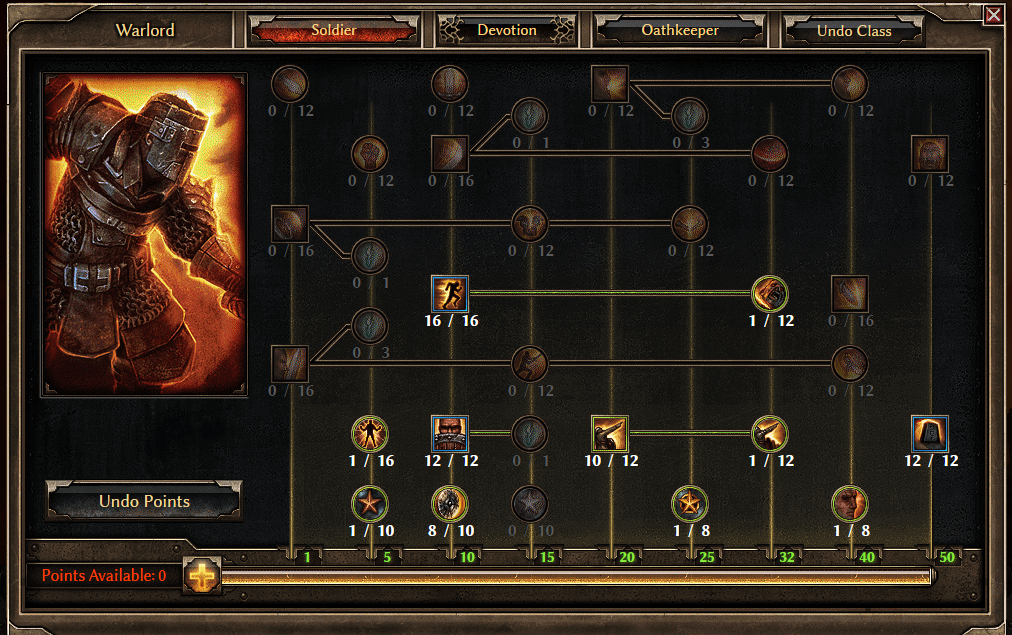
For the first part of the game and the early leveling process, you should put all your points into Soldier and try to get to Blitz (your main skill) as soon as possible. Try to get a minimum amount of 5 points into Blitz and then slowly add more points as long as you can deal with the rising energy requirements. If you feel like the energy requirements are too high, invest your points into the Soldier mastery instead. Slowly work yourself towards 10 points into Blitz.
Grab one point in Blindside (the Blitz modification) and then invest the rest of your points into Field Command, which is one of your most important auras. You should be close to Act 2 now, so get a value point in Military Conditioning, Shield Training, Decorated Soldier, Scars of Battle, and Menhir’s Will.
Once you got all of that, it is time to get some points into Oathkeeper.
Act 2 onwards and Oathkeeper tree
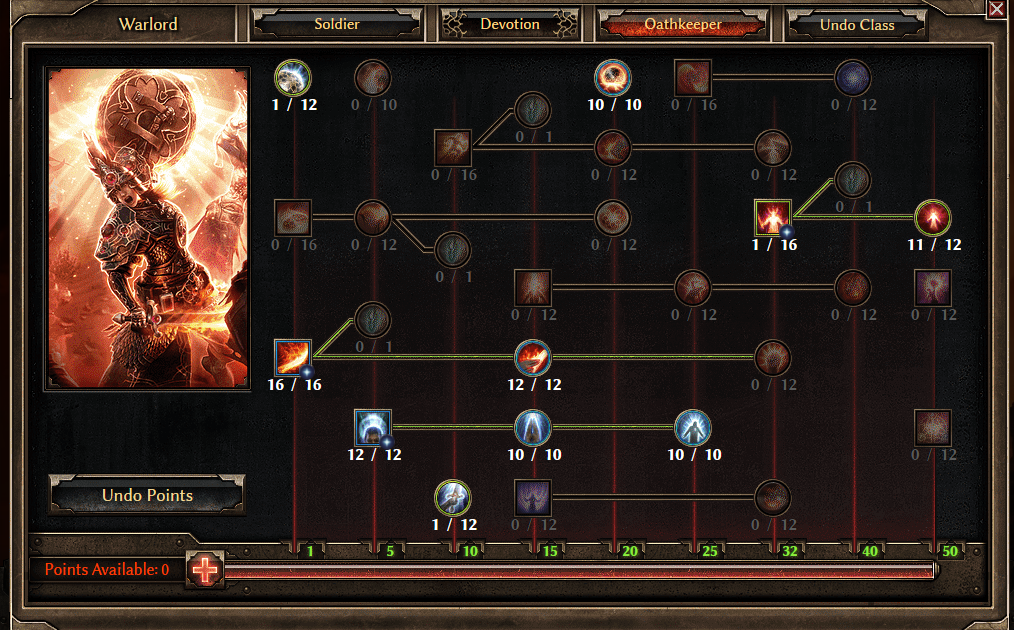
Now is the time to slowly start investing points into the Oathkeeper tree. Your first goal is to arrive at Presence of Virtue and get all the levels as soon as possible. Presence of Virtue is what is going to boost your energy regeneration to a point that you can use Blitz indefinitely, and is as such the most important pick in the early game. Once you have all the levels in Presence of Virtue, your energy regeneration is also going to be good enough for Blitz level 16, so use this aura to max out your main skill next.
Your next step is going to be investing more into the Oathkeeper mastery in order to unlock Presence of Virtue’s (PoV) first and especially second modifier. Mainly you want to get all the points into the second modifier “Rebuke”, while the first modifier “Haven” can wait with one value point. Then, get all the mastery points as soon as possible and only spend one point on Guardians of Empyrion. After maxing out the Oathkeeper mastery and getting one point on GoE, get its modifier Celestial Presence. This skill is very useful in combination with one of your devotion skills named Assassins’ Mark (see below).
Eventually, you will want to go back to the Soldier Tree. Seeing as Blitz has a small cooldown making it impossible to spam, you will also want to boost your auto attacks. Grab Shattering Smash and after that Righteous Fervor. After Righteous Fervor you will want to max out its modifier Consecration.
Since almost everything you do is in melee range, you will want to finally put some points into defensive skills to make sure you stay alive. Max out Overguard (and use it on cooldown), invest all the possible points into the Soldier’s mastery, and then max out Menhir’s Bulwark. You should be around the end of the game now, so the following last points are up for you to decide and rely on the gear and issues you might have.
Good points to spend them on are Shield Training or some one-point value picks like Resilience or Safeguard.
Devotion tree

The good thing about the devotion tree of this build is, that it is not fixed. You can change it up a little bit and adjust it to your playstyle and personal preference. A good way however is to start out is to take the Yellow start (Order) and move towards Panther. After that, get Assassins’ Mark (which is one of the more important picks).
Then, get the Primordial Crossroads (Blue) and max out Eel, Shieldmaiden, and Solemn Watcher. Follow up with picking Chaos Crossroads (Red) and Jackal. You are now set to deal with most of the early game content.
Now grab Lizard and Light of Empyrion on the upper right. The defenses you get from Light of Empyrion are going to be necessary to move into higher difficulties.
The next step is to respecc out of the three Crossroads points you got before to take the Ascendant Crossroads (Purple) point. Follow up by picking Owl, Empty Throne, and Wolverine. That should round out your defenses. Your final points should be spent into the Oleron to get Blind Fury and link to Guardian’s of Empyrion.
So to make it quick:
- Yellow -> Panther -> Assassins Mark
- Blue – > Eel – >Shieldmaiden – >Solemn Watcher
- Red – > Jackal
- Lizard -> Light of Empyrion
- Respec Yellow, Blue and Red -> Purple – > Owl -> Empty Throne – > Wolverine
- Oleron (link Blind Fury to guardian’s of Empyrion)
Feel free to experiment around as you progress through the build. There is no right answer here and you can mix it up a little bit.
Attributes
The attributes are a little bit complicated. Upon reaching level 100, you will want to have the following attributes spent:
- Physique: 26
- Cunning: 72
- Spirit: 9
However, while leveling the build you want to have a slightly different ratio in order to have more flexibility and defenses. So until you reach level 50, go for the following:
- Physique: 34
- Cunning: 11
- Spirit: 5
Don’t worry though, you will be able to respec your attribute points once per difficulty.
Gear and Leveling
This section is supposed to give you a few tips on some items that you can farm in the early game that are going to make your life significantly easier. The first item you will want to get in Act 1 is Milton’s Casque dropped from Milton Hart from the Sodden Hollow. The other one is Warden’s Fortress which as you might have already guessed, drops from Warden Krieg, the end boss of Act 1.
Act 3 has Ol’ Bloodbriar who drops Bloodbriar’s Thorn which has a 50% drop chance. There is also the chance to get the Fleshwarped Pauldrons dropped by Fleshwarped Commanders, so keep an eye out for these.
Once you unlock Elite difficulty and the Ashes of Malmouth content (Act 5) you can decide on whether you want to restart on Elite or move into the DLC area. I recommend doing the DLC area as there are some good pieces that can be gotten there, but seeing as Milton’s Casque drops very early into the game, you should consider visiting Milton in Elite difficulty and grab an Elite version of the helmet first.
In the DLC area, you can farm Bargoll’s Root which could take a while as he drops multiple pieces and only one at a time, but the weapon is well worth the trouble.
End-game gear
Once you reach the end-game, the rule is that most of the pieces that you want have to be crafted instead of farmed.
In order to get good resistances for the endgame, you will need to get Oleron’s Blood, two Ugdenbog Leather, a Seal of Blades, a Living Armor, and a Seal of Annihilation. These components do not drop and you will not encounter them at all while leveling. They must be crafted, once you farm their blueprints in the higher difficulties.
The best-in-slot relic is Mogdrogen Ardor, which is going to be quite a pain to craft.
You are going to need:
- Mogdrogen Ardor Blueprint
- Citadel Blueprint
- Ancestor
- Fortress
- Sanctuary
- Savage
- Mistborn
- Rampage
- Inferno
- Fortitude
- Hysteria
There are no particular end-game sets that you need to farm in order to get this build running. Personally, I think once you get to farming those sets you can consider respeccing a little bit out of this build and focus on something different, although I leave that choice to you. You should be able to judge for yourself what you need once you reach the point of end-game farming.
Conclusion
As stated above, this build is supposed to be a starter for you to get through the game and maybe farm some gear for other, more complicated characters. It is also supposed to be defensive enough for you to not have too much trouble playing through all of it. Feel free to experiment around and see how you can improve it or mix it up. Feel free to comment any additions or opinions below!
If you feel like playing Grim Dawn’s predecessor Titan Quest, consider these quick builds as a reference.


Can’t seem to reach the purple requirement for Oleron.
Hi , this might be because of a recent update. I will look into it and see if anything has changed